From idea to Apple App Store

I think it’s important as a developer to constantly challenge yourself. This means jumping in cold water and learn new languages and developing on other platforms.
I was interested in iOS development since a long time, but I did’t like objective C. Because swift was just released when I started playing around with app development, I concentrated my learning on swift. It’s a modern language and constantly evolving.

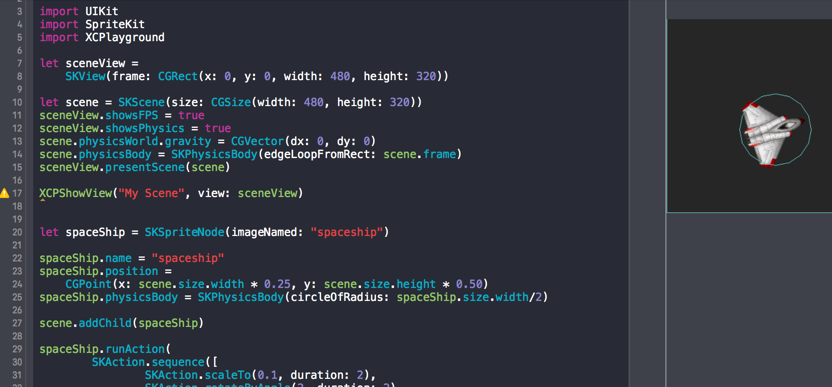
After doodling around with playgrounds and building SpriteKit 2D games from tutorials I decided to learn more about app development. My goal is to build a “Personal productivity” app, which helps to records, measure and optimise my time. I started developing the app in the mid of June 2016 with many question signs above my head. CoreData and especially AutoLayout were absolutely new to me and it took some time and effort get proficient skills.

A parallel project

One month after starting the personal productivity app tried to “Shh…” my baby to sleep. So I thought there must be an app for that. I downloaded  it, but it just played about 15 minutes without a (expensive) in-app-purchase. Because I had some first experience with audio from the SpriteKit development I spontaneously decided to build a simple app for myself. A simple app thats plays continuously a “Shhh…” sound.

A simple prototype with continuous playback was done in about half an hour. But I continued to add features like a more sophisticated UICollectionView layout (and an internal playlist for it), a configureable playback duration, a recording function, and so on.
Because I had to join the Apple developer program to use shared containers for the other app I decided to deliver this app to the app store on the beginning of October.

What I’ve learned

During the development phase which was primarily from the end of August to the begin of October I hit many walls. When you’ve experience and a good skill set for multiple years in another platform you forget this feeling. Getting started is always hard, but if you push the walls again and again you get moving and reach your goals.

I learned a much about AutoLayout and StackViews. When I just started out  I used “git checkout -f” many, many times because I totally ruined the layout with bad constraints or randomly changed “hugging priorities” & “compression resistance”. But after a while things things started to make sense. I’m far off being a AutoLayout expert but I’m quite used to it and will get a working layout without hours of fiddling around.
I heavily used StackViews, which made things much easier – I’m glad I started AppDevelopment after they were available.

Because I store static sounds and recorded sounds in the AppContainer together with 2 pList files (static & recorded sounds) I learned how iOS stores data.

I used Xcode Unit-Testing (XcTest) for the playlist logic and also the BackgoundAudioPlayer. This parts of the app contain much of logic, so It’s good to have a safety net around them. The ViewControllers are not covered with test’s, this may be something to learn at a later point of time.
The PPA app contains a coded UI test, which were not easy to develop. I used the recording function to learn how to control the ui. They are very brittle, but give a good overall feedback. They take about 2 minutes to run, I usually prefer shorter feedback cycles.

The most exiting part was the audio API “AV Audio” itself. Playing a sound is very simple, but playing background audio for a configureable time and recording audio requires a a deeper understanding of the API. For a overall good user experience iOS manages audio playback in sessions. With audio sessions you configure wether you playback and / or record audio, in foreground, background or mixing in with other concurrent playing sounds.

What’s very different to what I’ve worked before was muli-threading in iOS. As many other API’s “Grand Central Dispatch” was a very C like API but very powerful. Performance is very important in mobile apps, I early encountered performance problems while scrolling the UI ViewController. When I started working with async queues I learned more about “ARC and memory management” to prevent memory leaks.

Migration to Swift 3

During development I downloaded a few times an XCode 8 beta version and tried the swift 3 migration. As soon as I had the golden master version (the last before production) I migrated the coding to swift 3.

As apple promised the conversion assistant touch nearly every file. There were also many manual changes necessary. Due tue the “Swift API Design Guidlines” the coding looked really beautiful. As a developer that has not really developed with objective C many API’s usage and names were very C like and horrible to use or read before (NS*, CoreGraphics, GCD, …).

Luckily my codebase wasn’t that huge, because a swift 3 migration requires a lot of work – and can break things.

Handoff to applE – The Review

Every app that is in the apple app store listed, is previously reviewed by apple. They have many guidelines about how apps should be developed and what’s allowed or not. After many testing and reading the guidelines and checklists I submitted the app for an external testing (testflight) review and in about 24h I was allowed to release the app for external testflight testers.

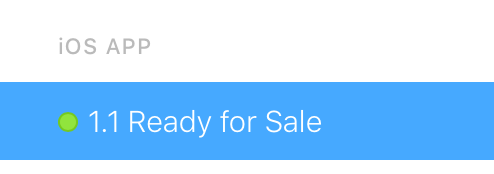
I didn’t expected it, but the final App Store review was successful on the first submit again in about 24h the app was “ready for sale”, after a few hours it was available on the app store. I was sure that I missed something small that would lead to a rejection. A re-review after a minimal app and description change took again about 24h.

What the git!

As a side effect I heavily used git as version control system (which is available at GitHub). I used it already before, but not that much. For this project I tried to commit small changes and for larger I used branches. It worked very well and I finally got some deeper understanding of merging and rebasing. And I learned that it’s quite painful if you wait to long until you merge branches again 😉

I’m still learning more about more advanced topic’s. I worked with SVN and Microsoft Team Foundation Server before, but git is my absolute favourite. It’s so simple and lightweight, but can solve really complex problems.

I recommend reading the free online available book “Pro Git“.

And now?

It started with many problems that lead to more problems. But by the time  it became fun to develop with Xcode and swift. Raywenderlich.com tutorials, videos and sample code were a great help that saved my a lot time reading all the apple documentations.

After playing around with the analysis tools I found a situation that could lead to a race condition. This alone wasn’t worth a re-review and update.  I’ll wait a few weeks for crash reports or any feedback and then submit an update for a review.

In the meantime I continue the development of the initial project. I added a widget (today extension), that can access the app’s core data database, which is now in a shared container. To use the app myself in the near future I’m working currently on a “CloudKit” sync (to prevent data loss).

I’ll definitively continue developing iOS apps. Not to become a 1€ app or in-app purchase millionaire, just for fun.
The fact that Apple and SAP have a partnership shows that there is a market for native enterprise applications – even if SAP has a modern powerful web UI technology. Looks like SAP developments becomes more and more technically interesting with modern ABAP, JavaScript and Swift 🙂

The iOS Projects on Github

Apple App Store – Baby Shhh… (US App Store)

Git – SleepBabySleep / Baby Shh…

Git – PersonalProductivityAssistant / PPA

Record UI tests in Xcode

In a previous article I gave a short introduction into UI testing with Xcode. It works fine, but sometimes it’s a bit complicated to learn how to interact with the ui elements. This video shows by example how the recording feature helps with this problem.

Demo: Record UI interaction


Continue reading “Record UI tests in Xcode”

XCode iOS UI testing

As Martin Flowler described in his article TestPyramid, the UI should be the highest (and not the only) layer of the tests.  They are a safety net and errors detected on this layer can point to missing test’s on a lower layer. Automated UI test’s tend to be brittle, because every change in the UI can result in failing test’s.

Since version 7 XCode supports UI tests, with test classes deriving from XCTestCase:

Here’s an example test:

class PersonalProductivityAssistantUITests : XCTestCase {
    
    var app = XCUIApplication()
    var toolbarAddActivityButton: XCUIElement?
    var activityInputField: XCUIElement?
    //...
    var timeLogSaveButton: XCUIElement?
    
    override func setUp() {
    	super.setUp()
    	
    	continueAfterFailure = false
     
    	app.launch()
    
    	activityInputField = app.textFields["textEditActivity"]
    	toolbarAddActivityButton = app.toolbars.buttons["Log Time"]
        // ...
    	timeLogSaveButton = app.navigationBars["Time Log"].buttons["Save"]
    }
    
    override func tearDown() {
    	super.tearDown()
    	
    	app.terminate()
    }
}
func testCanAddAndEditAndDeleteActivityFromTable() {
    //
    // Add
    //
    // Open the add time log view
    waitForElementToAppear(toolbarAddActivityButton!)
    toolbarAddActivityButton!.tap()
    toolbarAddActivityButton!.tap()
    
    // Type new time log informations
    waitForElementToAppear(activityInputField!)
    let initialActivityName = getActivityNameWithDateTime()
    typeActivityName(initialActivityName)
    labelActivity?.tap()
    
    buttonPickDateTimeFrom?.tap()
    setDatePickerValues(monthAndDay: "Aug 1", hour: "10", minute: "30", amPm: "AM")
    setDateTimeFromButton?.tap()
    
    buttonPickDateTimeUntil?.tap()
    setDatePickerValues(monthAndDay: "Aug 1", hour: "11", minute: "15", amPm: "AM")
    setDateTimeUntilButton?.tap()
    
    timeLogSaveButton?.tap()
    
    // Verify element has been added
    XCTAssert(getTableStaticTextElement(initialActivityName).exists)
    
    //
    // Edit
    //
    // tap the actiity to open the add/edit segue
    getTableStaticTextElement(initialActivityName).tap()
    
    let changedActivityName = "\(getActivityNameWithDateTime()) #test"
    waitForElementToAppear(activityInputField!)
    clearAndTypeActivityName(changedActivityName)
    
    timeLogSaveButton?.tap()
    
    // Verify element has been modifed
    XCTAssert(getTableStaticTextElement(changedActivityName).exists)
    
    //
    // Delete
    //
    // Swipe up until the new element ist visible
    doSwipeUpUntilTableStaticTextIsHittable(changedActivityName)
    // Swipe left and push delete button
    doDeleteTableRow(changedActivityName)
    
    // Verify the element has been deleted
    XCTAssert(!getTableStaticTextElement(changedActivityName).exists)
}

This is how it looks like, when it runs in the debugger:

You can find the full test in the latest version of my learning app PersonalProductivityAssistant @github.

Learn more about recording UI tests.

iOS Stack Views

Building layout’s for mobile apps is complex because of the many different device screen sizes available. In iOS development it makes a huge difference if you test your app with an iPhone 4, 5 or 6.

So instead of drawing a fixed layout, we place controls and describe the layout with constraints (distances between controls, distance to margin, equal widths…).
Autolayout constraints are tricky, and in iOS 9 Apple introduced the Stack View to simply building app layouts.

If you know HTML, you’ll be immediately familiar tho the concept. Stack Views are like simple tables with row, cells and layout options.

In our sample app we use multiple nested horizontal and vertical stack views to build the layout.

Stackview_Illustrated

Demo

Swift API Design Guidelines

I recently watched the WWDC ’16 Session “Swift 3 API Design Guidelines” and I’m amazed about about apples direction with Swift.
I started playing around with Swift when it was announced at WWDC 14, and since then lot’s of things have changed. Swift, which is now open source, is constantly evolving and version 3 brings major changes.

The API Design Guidelines are still under development, but they’re worth studying. I love clear and focused code that can be read like a story.

Apple also announced, that the whole swift standard API is being reviewed to conform the API design guidelines.
Most current API’s like Cocoa which were originally developed for Objective C. Working with this API’s in swift feels somehow awkward. The necessary changes to migrate existing code bases will be high, but XCode will support it with “Fix-It’s”.

This is a huge announcement, and it shows again, that apple pushes developers towards the Swift language.

The “Elephant” (the C libraries) will be ported to swift too. Instead of using the global “stringly” typed functions with awkward parameter labels, we’ll be able to use well designed and strongly types swift classes.

Interested in more details? Have a look here.

XCode Playground Part IV: SpriteKit (2D game engine)

In the last part of the XCode Playground Series I demonstrate how use it with SpriteKit. It’s very simple to test animations and physics outside of your project.

But as mentioned in the last Part, the performance isn’t very good. Adding too much nodes or complex physics will lower the FPS rate extremly.

But let’s have a look how you can use it:

You find the source code here: https://github.com/zs40x/XCodePlayground_BlogSeries/blob/master/Part_IV.playground/Contents.swift

If you have a Mac, install Xcode and give it a try!

Xcode Playground Part III: Behind the Scenes

The Xcode Playground is an interactive REPL (Read-Eval-Print-Loop).

While you’re editing the code, Xcode executes, interprets and displays the results in the different views (timeline, result and console).

You can use the Swift interpreter from the command line:

There are also online interpreters like SwiftStub.com.

All-in-all the Playground coding experience is extremely interactive and feels like magic.
But this comes at the cost of performance. Complex or computing-intensive scripts run laggy. Even in the current XCode 7.1 release I regularly encounter errors that require an XCode restart.

But that’s okay!

For learning & testing this is acceptable and in many cases a better choice then a usual test project. I use it also for SpritKit test’s wich I demo in the next and last Episode of the XCode Playground series.

Links
Introduction to the Swift(Apple)
SwiftStub.com (online Swift Interpreter)

XCode Playground Part I: Diagrams

I really like developing with Swift for iOS for fun. With Xcode 6 (and Swift) Apple included the Concept of Playgrounds for learning, testing and so on. Coding in a Playground is interactive, per Default Xcode builds automatically while you change the code.

Playground are very simple, but also powerful. Over the next Weeks I’ll demonstrate other cool Playground Features.

Playground with 2 DiagramsLet’s have a look at the Diagrams:
In my 2 Examples I use loops and Playground tracks the variable Changes. If you use “print” the Console Output would be displayed, but to use the Diagram we just need an Variable as single Statement or an Operation as you see in the second Example.

I made a short Video to demonstrate how to open the Diagram. Note that the diagram gets updated instantaneously after changing the code!